参照指定技术参考资料,完成Kubernetes(K8s)集群环境的搭建、配置与部署,成功搭建可用的集群服务环境(https://opshub.com.cn/?p=316)。
1、在master上安装kubelet和kube-proxy将master作为node加入集群,然后打上污点,避免pod调度到上面
kubectl taint nodes k8s-master1 node-role.kubernetes.io/k8s-master=:NoSchedule若未解决该问题,longhorn-manager Pod 将输出下述报错,并陷入持续重启死循环:
level=fatal msg="Error starting manager: Internal error occurred: failed calling webhook \"validator.longhorn.io\": failed to call webhook: Post \"https://longhorn-admission-webhook.longhorn-system.svc:9443/v1/webhook/validaton?timeout=10s\": net/http: request canceled while waiting for connection (Client.Timeout exceeded while awaiting headers)"该问题极易产生排查误区:从现象上容易误以为是 longhorn-manager Pod 所在节点主动发起校验请求、访问 longhorn-admission-webhook Service 的 9443 端口出现 TCP 连接超时。 实际根因并非 manager 自身发起调用,而是 K8s APIServer 向该 Webhook 服务 9443 端口发起校验请求时 TCP 建连超时。该报错并非 Webhook 业务校验逻辑执行失败,而是底层网络不通导致无法连通 Webhook 服务,最终造成 longhorn-manager 启动时触发致命错误并崩溃、反复重启。
2、下载longhorn源码包:
https://github.com/longhorn/longhorn/archive/refs/tags/v1.4.4.zip生产环境部署建议选用 v1.3.3 发行版本。该版本完成完整官方标准化测试,具备最佳兼容性与运行稳定性:
https://github.com/longhorn/longhorn/archive/refs/tags/v1.3.3.zip3、给集群全部 Node 节点安装运行 iSCSI 客户端、NFS 客户端的 Pod 服务,保障存储挂载能力
将源码包 longhorn-1.4.4/deploy/prerequisite 目录下两份配置文件:longhorn-iscsi-installation.yaml、longhorn-nfs-installation.yaml 上传至 K8s 管理节点 K8S-master1;上传完成后依次执行部署命令:
kubectl apply -f longhorn-iscsi-installation.yaml
kubectl apply -f longhorn-nfs-installation.yaml
4、执行安装前的环境检查校验
提取源码包路径 longhorn-1.4.4\scripts 中的环境检查脚本 environment_check.sh,上传至 K8s 主控节点 K8S-master1;文件传输完成后执行对应校验命令:
yum -y install jq
bash ./environment_check.sh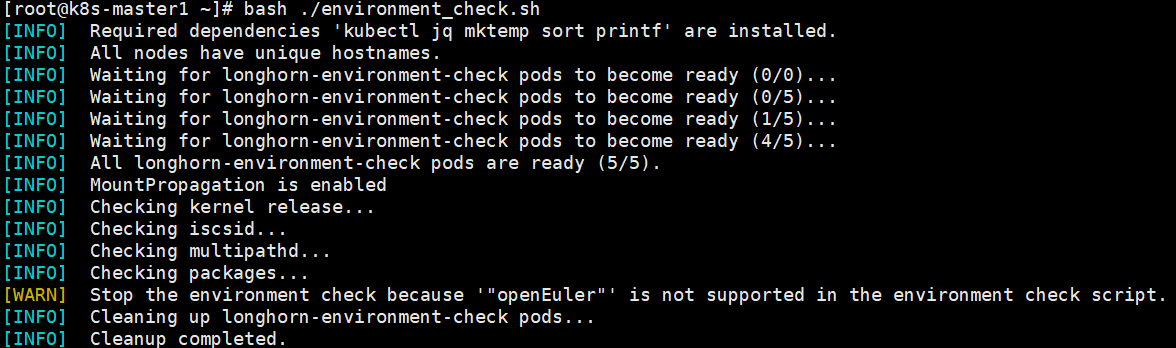
5、打开 longhorn-1.4.4\deploy\longhorn.yaml 资源清单文件,按需对文件内部相关配置内容进行编辑、修改
# Source: longhorn/templates/deployment-ui.yaml
kind: Service
apiVersion: v1
metadata:
  labels:
    app.kubernetes.io/name: longhorn
    app.kubernetes.io/instance: longhorn
    app.kubernetes.io/version: v1.4.4
    app: longhorn-ui
  name: longhorn-frontend
  namespace: longhorn-system
spec:
  type: NodePort #ClusterIP修改为NodePort
  selector:
    app: longhorn-ui
  ports:
  - name: http
    port: 80
    targetPort: http
    nodePort: 31832 #null修改为自定义的tcp端口
# Source: longhorn/templates/storageclass.yaml
apiVersion: v1
kind: ConfigMap
metadata:
  name: longhorn-storageclass
  namespace: longhorn-system
  labels:
    app.kubernetes.io/name: longhorn
    app.kubernetes.io/instance: longhorn
    app.kubernetes.io/version: v1.4.4
data:
  storageclass.yaml: |
    kind: StorageClass
    apiVersion: storage.k8s.io/v1
    metadata:
      name: longhorn
      annotations:
        storageclass.kubernetes.io/is-default-class: "true"
    provisioner: driver.longhorn.io
    allowVolumeExpansion: true
    reclaimPolicy: "Delete" #生产环境建议修改为Retain
    volumeBindingMode: Immediate
    parameters:
      numberOfReplicas: "3"
      staleReplicaTimeout: "30"
      fromBackup: ""
      fsType: "ext4"
      dataLocality: "disabled"
6、安装longhorn
kubectl apply -f longhorn.yaml7、状态查看与常用指令
kubectl get all -n longhorn-system -o widekubectl get pods -n longhorn-system -o wide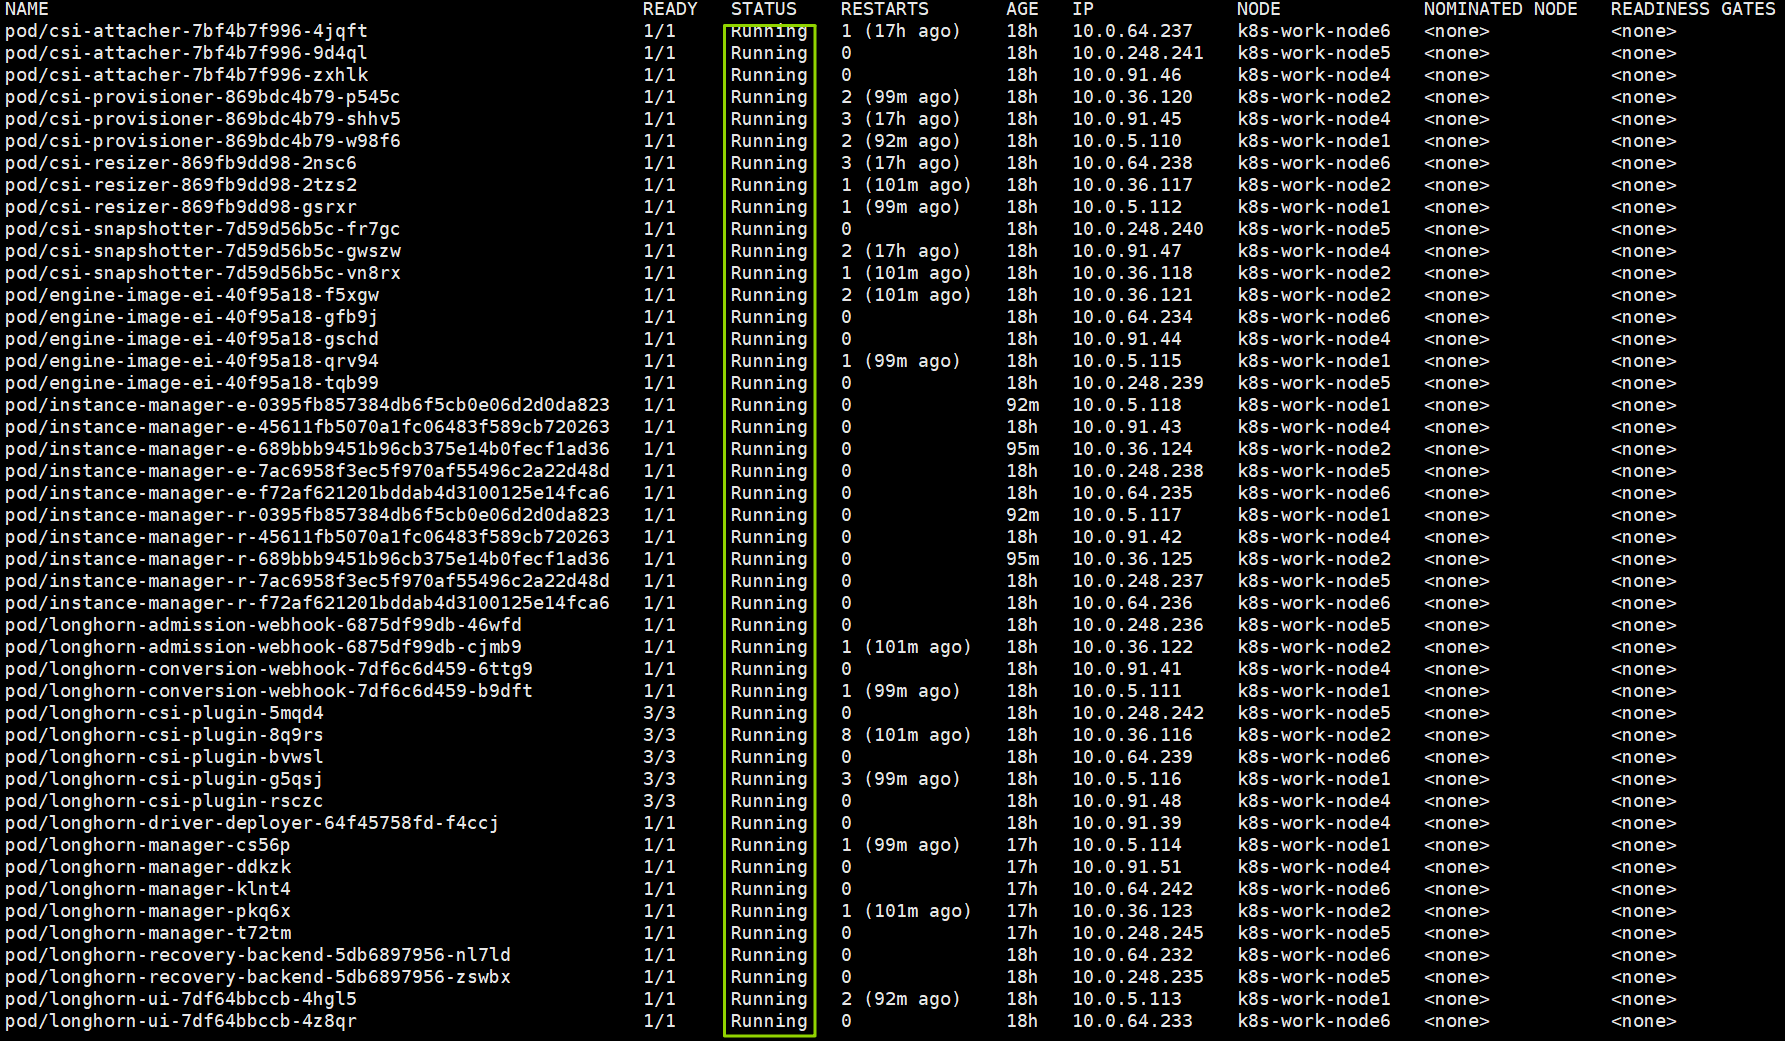
kubectl describe svc longhorn-admission-webhook -n longhorn-systemkubectl get endpoints longhorn-backend -n longhorn-systemkubectl rollout restart daemonset longhorn-manager -n longhorn-systemkubectl rollout status daemonset longhorn-manager -n longhorn-system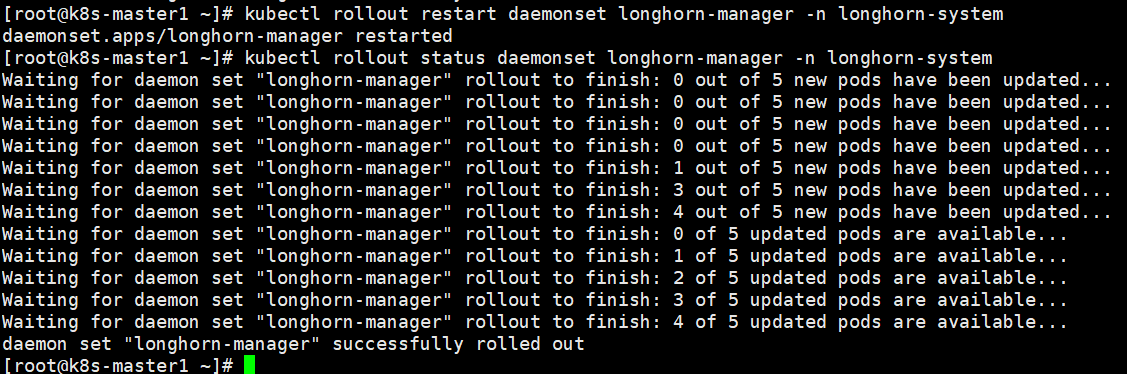
kubectl get validatingwebhookconfigurations.admissionregistration.k8s.iokubectl get mutatingwebhookconfigurations.admissionregistration.k8s.io8、longhorn-ui(frontend)的操作
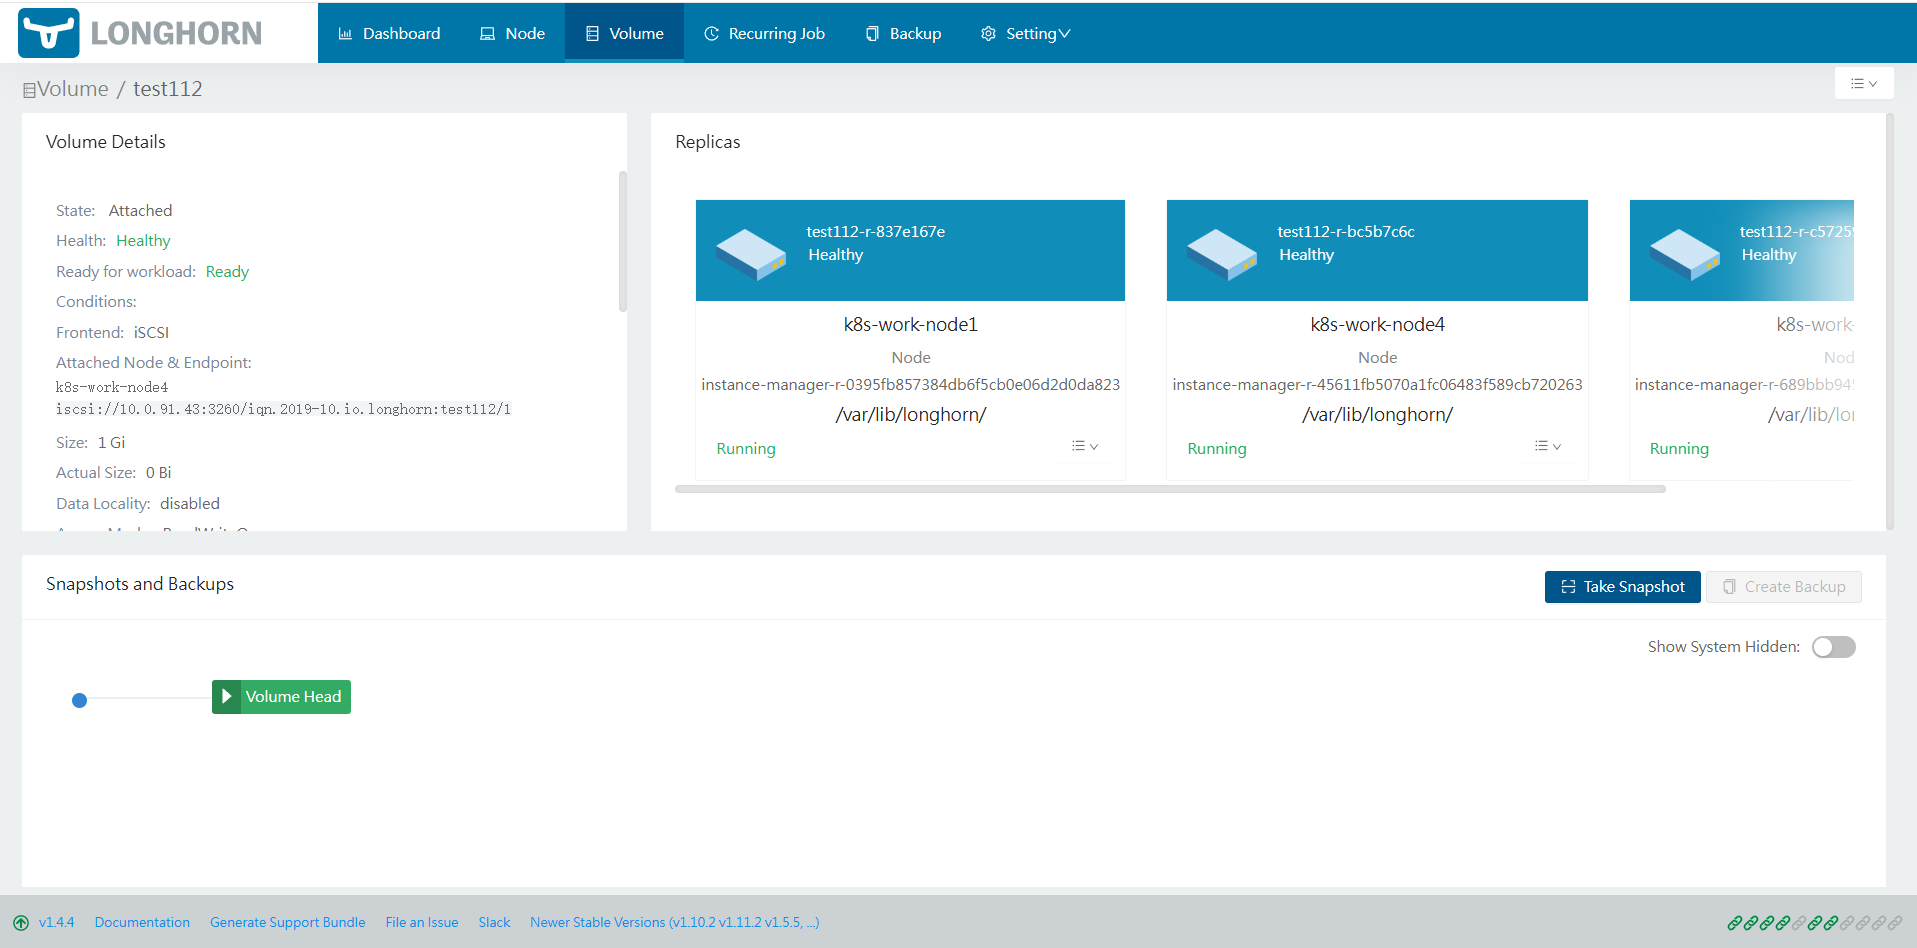
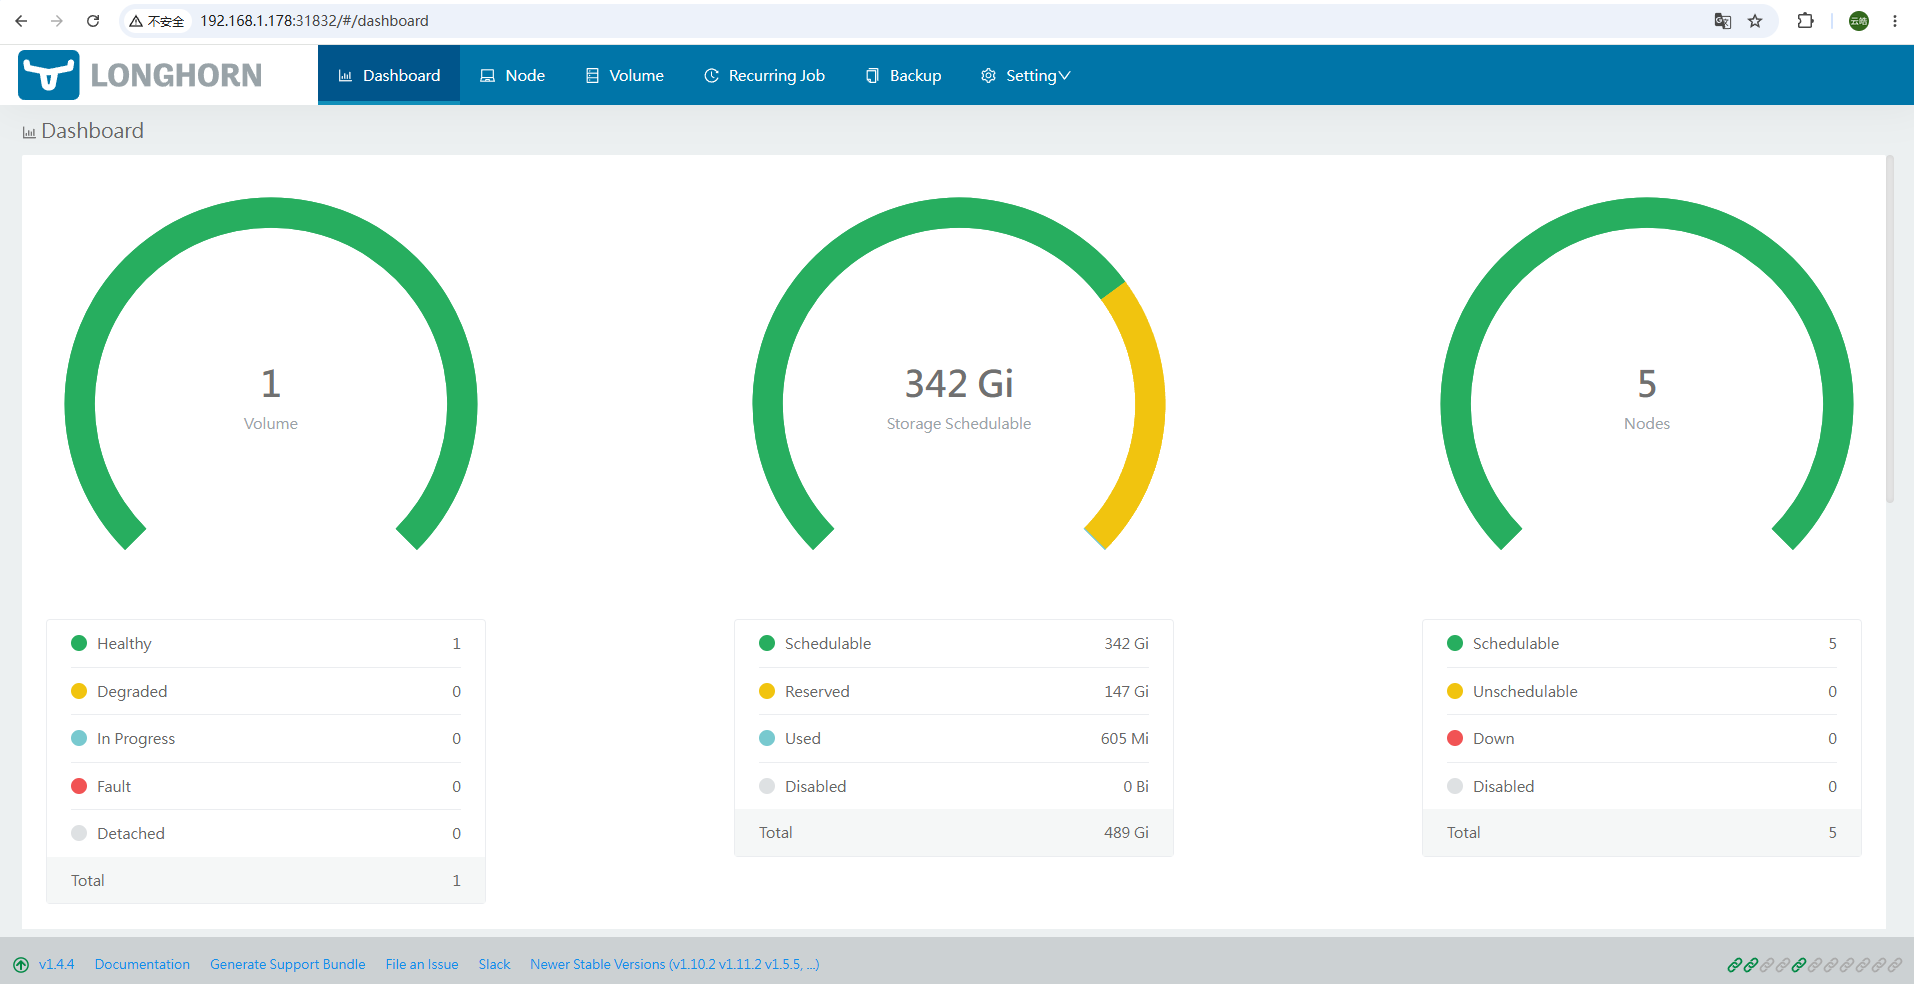
打开浏览器,输入集群任意节点 IP 并搭配端口 31832,访问 Longhorn 管理页面
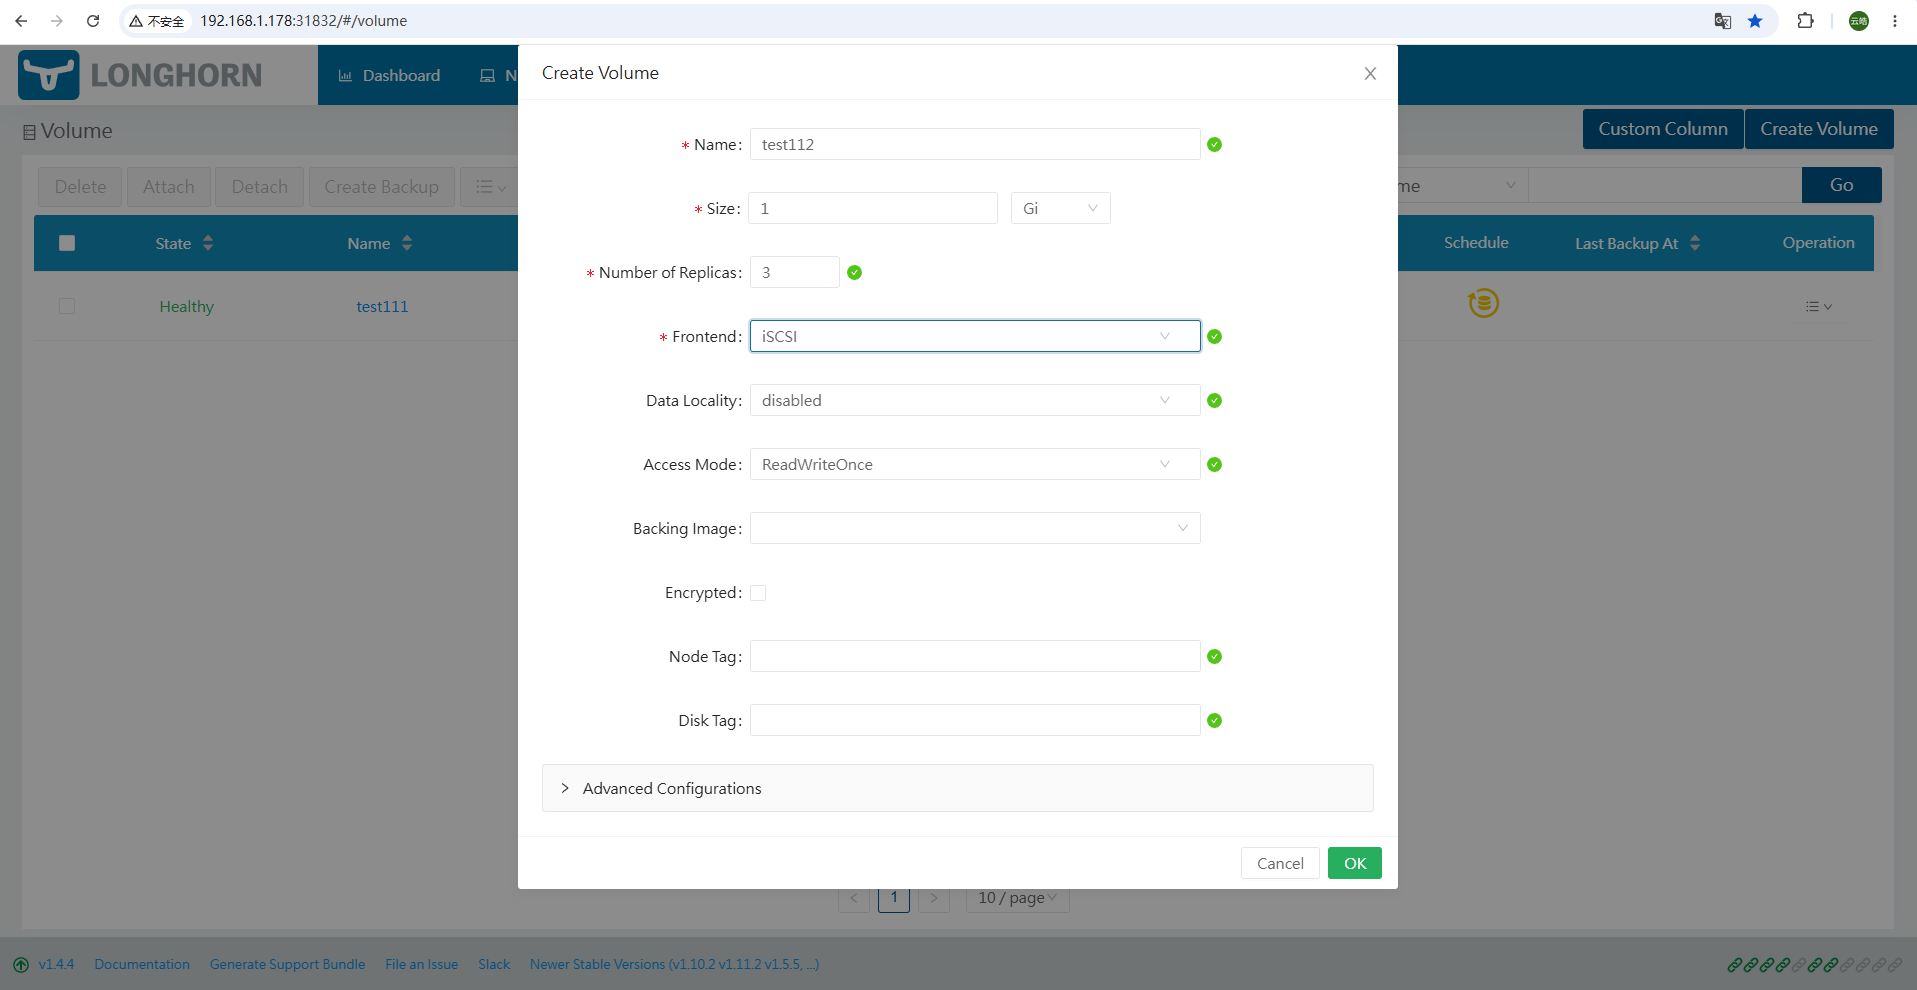
Volume->Create Volume
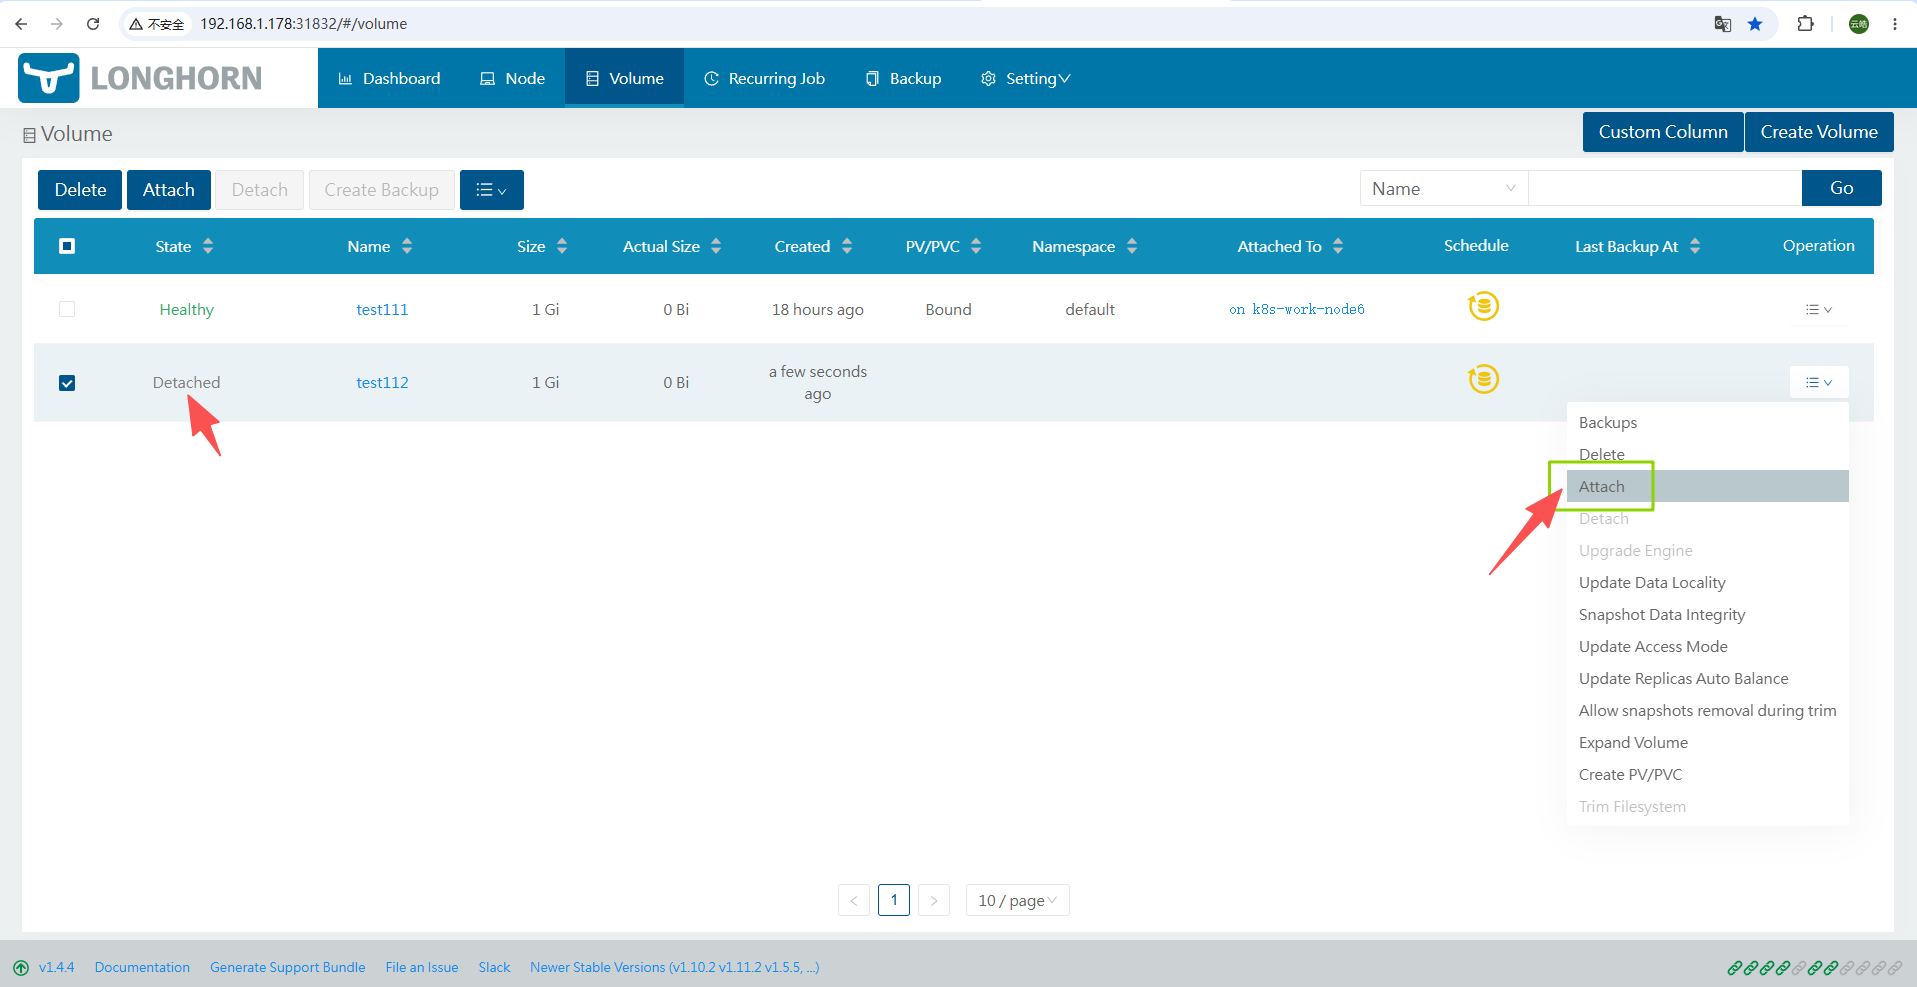
Attach

Create PV/PVC